Please note, this guide is written by Goodyear Toastmasters, a local club in Toronto. We did not design the FreeToastHost system or have any affiliation with it, other than being users ourselves.
1. Login to the website as a site admin.
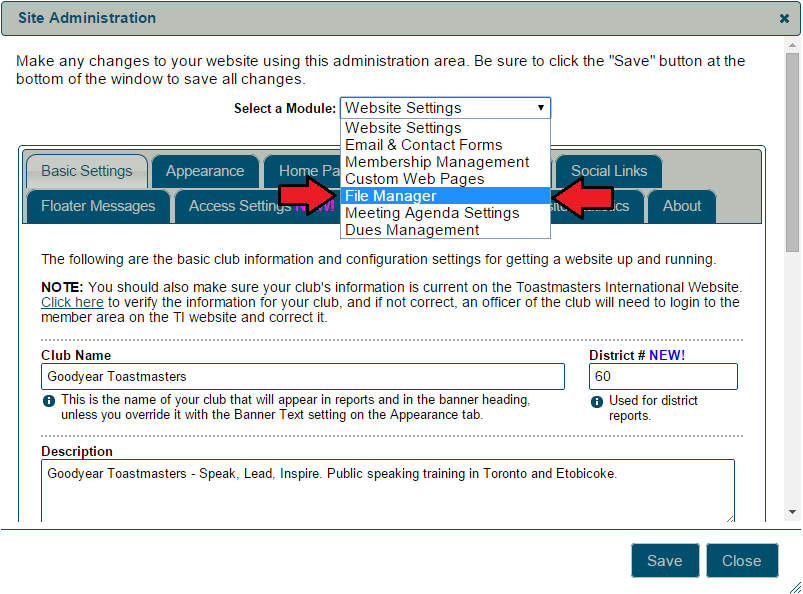
If you do not have your club's login information, you will need to obtain it from your club's webmaster. Once you are logged in, enter the 'File Manager,' located within the drop down menu at the top.

2. Upload your files.
Press the "Select File to Upload" button and choose whichever files you want to add to the club website.
3. Organize your uploaded files with folders.

This is not straightforward, so here's how folders work on FreeToastHost. Folders are created via the uploaded file name. Whatever comes before the colon will become the folder. Take for example, the following:
a) Guest Kit: Welcome Letter
b) Guest Kit Welcome Letter
In the above, version (a) will be placed in a folder called 'Guest Kit.' The file name will simply be 'Welcome Letter.' In version (b), you will create a file called 'Guest Kit Welcome Letter' that is not contained within a folder.
Do you want to have multiple files within the same folder? Then give them the same name before the colon.
4. Make your uploads public or private.

To choose whether you want your upload to be public or private, simply click the lock icon to toggle it as one or the other. It's that easy.
We hope all of this helps. As mentioned at the beginning, please let us know if you have any questions.
If you looking to join a great Toronto Toastmasters club, then come check out Goodyear Toastmasters, located on the west end of the city near Mississauga.
- Jonathan Holowka
